The IP address of your computer will be used by a network whenever your system goes online. Each connected device in a network is given a unique IP address, so that to avoid complications. This makes it possible for differentiating between them.
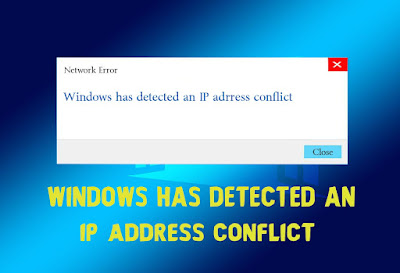
However, there can be instances where two or more devices can be assigned with the same IP address ( Due to network device malfunctioning, virus attack or incorrect PC settings ). When this happens your computer will notify you with the error message,
'' Windows has detected an IP address conflict ''
What this error means is that the, the IP address connected is already shared with a different computer. Thus, preventing you from connecting to a network. Fortunately, this is a common IP address error and it comes with many possible ways to fix it.
In this article, you will get the information on 7 Ways to Fix Windows Has Detected An IP Address Conflict in Windows. After implementing these steps. your device will be restored with a unique IP address.
Let's get started,
1. Renew IP
If the problem persists, the underlaying problem could be with the computer itself. Another proven method to fix windows has detected an IP address conflict is by renewing IP. This method involves releasing the current IP and assigning with a new IP from the DHCP server.
To renew IP,
- Press '' Windows + R ''
- Type '' cmd '' Right click on it
- Choose Run as Administrator
- Type the command and Press Enter
ipconfig /renew
2. Use Dynamic IP
Static IP address in simple terms means that a manually configured IP. Sometimes static IP address causes complications by interfering with other IP addresses on the same network. If your computer uses static IP address it can also be the reason why you are getting this error.
Using a dynamic IP makes sure that you are assigned with a random IP address. So you need to remove static IP address from the network adapter settings. Following this, you can request the ISP for a dynamic IP.
For using Dynamic IP,
- Press '' Windows + R ''
- Type '' ncpa.cpl ''
- Choose your network adapter
- Right click on it and Select Properties
- Select Internet Protocol Version 4 ( TCP/IPv4 )
- Go to General tab
- Check the boxes,
Obtain DNS address automatically
8. Press Ok
3. Update Network Drivers
Outdated network drivers can give rise to various issues including windows has detected an IP address conflict error. Therefore, whenever there is an IP address issue you must try updating the network drivers. The option to update drivers is available from both device manager and manufacturer's site. Or else, you can do this using a third party tool.
4. Restart Router
A router works by assigning IP address to the respective device. If there is any specific malfunctions in the router it can result in the error of IP address conflict. So a simple restart should be able to fix windows has detected an IP address conflict error.
Look for router's power button and press it until your router turns off. Wait for a few seconds and press it again for it to restart. This will assign your computer with an IP address which is flawless.
5. Disable IPv6
There exists two types of protocols in IP address. Those are the IPv4 and IPv6. Even though IPv6 is the most recent protocol, not all the devices support this. Once this happens it can trigger IP address complications. One such is the windows has detected an IP address conflict error. One way to fix this is by disabling IPv6.
To disable IPv6,
- Press Start
- Type '' Network and Sharing center '' and double click on it
- Select '' Change Adapter Settings ''
- Choose the network
- Right click on it and select '' Properties ''
- Uncheck the option '' TCP/IPv6 ''
6. Change DNS Server
A faulty DNS server can also lead to this network error. The only option here is to modify the DNS server address. Apart from the current DNS server, you can use Public DNS server provided by Google.
To change DNS server,
- Go to Start
- Type '' network connections '' and right click on it
- Select '' Properties ''
- Select '' Local Area Connection ''
- Press '' Properties ''
- Choose '' Use the following DNS server address ''
- Type - 8.8.8.8 for the preferred DNS server
- Type - 8.8.4.4 for the alternate DNS server
- Check '' Validate Settings upon exit ''
- Press Ok
7. Re-enable Network Adapter
A network adapter is a piece of hardware which enables communication between a computer and a network. It is a crucial component for connecting to a network. According to the internet connection the network adapter can be of both types ( USB and Wireless ). . Whatever it is, re-enabling the network adapter can fix network related problems.
To re-enable network adapter,
- Press '' Windows + R ''
- Type '' ncpa.cpl ''
- Choose your network adapter
- Right click on it and Select Disable
- Again Right click on it and Press Enable


No comments:
Post a Comment