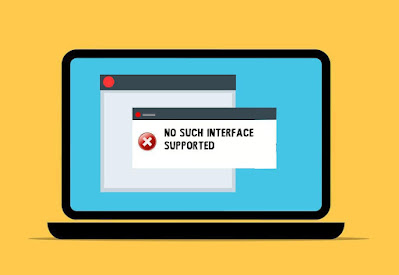
Windows users have reported to experience an unusual error in their PC. '' No such interface supported '' is a type of error which occurs when the system files get corrupted.
From oldest to latest, all the versions of windows operating system are known to suffer from this error. This kind of error hinders your PC operations. Most often this error is encountered when the windows explorer faces glitches.
Since the windows explorer no longer works, users will have problem in basic PC functions such as opening files & folders, control panel. Even a simple copy and paste cannot be performed during this error. Moreover, there is no one particular cause for this error. Even though there are variety of causes, there exists many possible solutions.
In this article, I will be covering about 6 Ways to Fix No Such Interface Supported in Windows. Most of the solutions are simple enough to solve this problem alone.
Let's get started,
1. Perform SFC Scan
Sometimes corrupted system files might be the reason why you are getting no such interface supported error. System File Checker (SFC) is a tool which helps in fixing corrupted files as well as restoring missing files. Hence, it is also worth performing a SFC scan.
To perform SFC scan,
- Press '' Windows + R ''
- Type '' cmd '' Right click on it and Select Run as Administrator
- Type the command and Press Enter
2. Perform DISM
Another tool you can try to fix no such interface supported error is the Deployment Imaging and Servicing Management (DISM). You can use this tool to scan, check and restore the health of the system files.
To perform DISM,
- Press '' Windows + R ''
- Type '' cmd '' Right click on it and Select Run as Administrator
- Type the command and Press Enter
3. Perform CHKDSK
Check Disk Utility (CHKDSK) is a process where bad sectors are identified inside the hard drive. Followed by the identification they are also fixed. However, similar to restoring system this process too deletes data.
To perform CHKDSK,
- Press '' Windows + R ''
- Type '' cmd '' Right click on it and Select Run as Administrator
- Type the command and Press Enter
4. Reregister DLL
DLL files known as actxprxy.dll is related to this error ( Once the DLL stops responding or loading ). It is the DLL responsible for deploying shell elements. So by reregistering this particular DLL you can fix this error.
To reregister DLL,
- Press '' Windows + R ''
- Type '' cmd '' Right click on it and Select Run as Administrator
- Type the command and Press Enter
5. Run Antivirus Scan
Malicious threats plays a major role in triggering this error. Particularly, the threats like rootkit,virus and spyware. Running an antivirus scan effectively removes viruses and other harmful elements off your PC. Therefore, in order to fix this error we recommend you to scan using an antivirus software. Once the scanning process is over, reboot the computer.
6. Restore System
The final resort for fixing no such interface supported error is by restoring system. Restoring system reverts your computer back to the state where the PC did not experience this issue. This method is assured to work if the error did not exist before the creation of restore points.
Be aware that all the files present inside the installation drive will be deleted. Therefore, prior to performing system restore take necessary back up.
To perform system restore,
- Go to Start Menu
- Type '' Control panel ''
- Select '' Recovery ''
- Press '' Open System Restore ''
- Press Next
- Select the Restore points
- Press Next
- Click Finish


No comments:
Post a Comment